

Actions in an automation (email, task, field, assignment)
Create, configure and reorder the actions of an automation rule.
An automation rule responds to a trigger and then runs one or more actions. In this article you'll learn which action types Univents offers, how to configure them, and how to set their order.
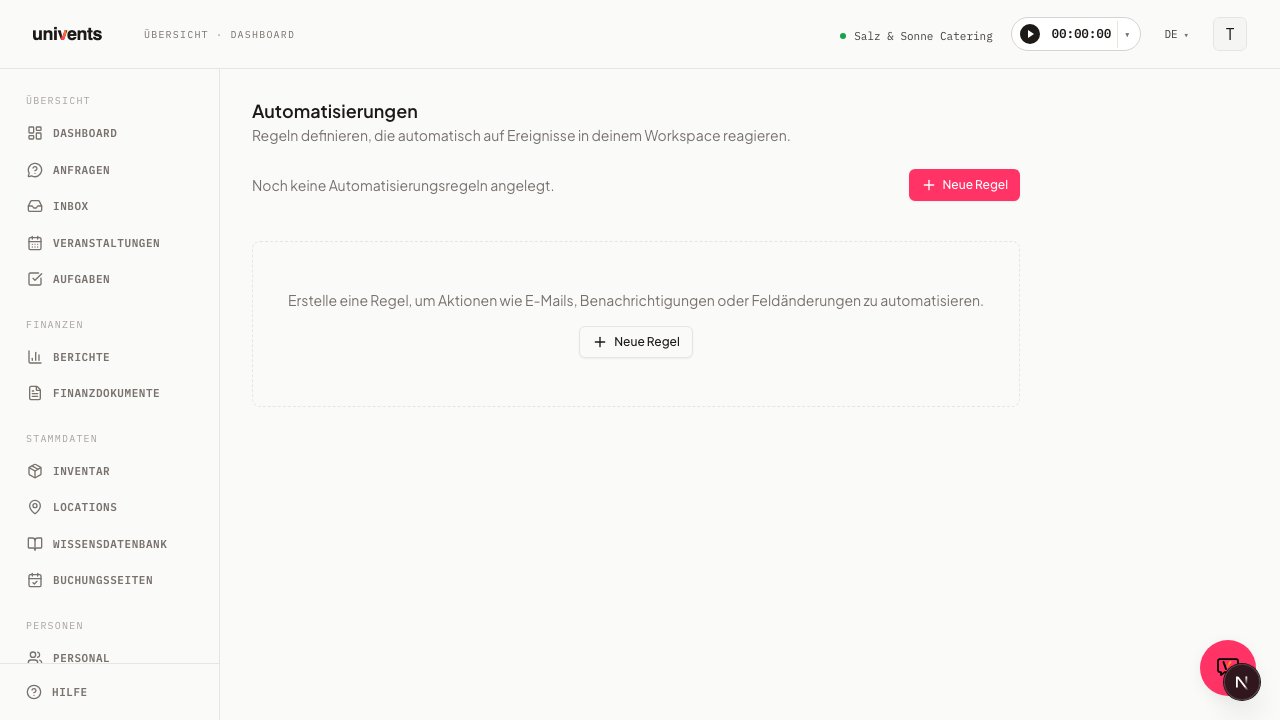
Where you define actions
Actions are part of an automation rule. You create them in the rule editor, which opens when you create a new rule.
- In your workspace, open the Automations section.
- Click New rule. The canvas opens with an empty rule. Alternatively, open an existing rule without branching in the form dialog via the pencil icon in its row.
- At the top, enter a Rule name, and under Trigger, choose the event that should start the rule.
- Move to the Actions section.
In the Actions section you define what should happen once the trigger fires. Every rule needs at least one action before you can save it. Use the Save button to store the finished rule.
You don't have to assemble the most common action combinations yourself: the Templates button on the Automations page ships six ready-made rules you can install and adjust. On a freshly installed template, always check the Notify user action — it initially lists only the person who installed the template as the recipient.
The 16 action types
For each action you select exactly one type from the Action type dropdown. 15 types are available:
- Send email: Sends an email. You choose a Template — alongside the built-in system templates, this list also includes your own templates (see the “Custom mail templates” section further below) — and can optionally set a custom Subject — leave it empty and the template's own subject is used. You can also set a fixed To (email) address (for example the kitchen or a supplier) — without one, Univents resolves the recipient automatically from the inquiry/event; this field deliberately does not accept placeholders. Subject and Template variables, on the other hand, take text that may contain placeholders — the placeholder button (see below) helps you insert them. Not available under the Email received trigger (loop protection, so an inbound email can't automatically trigger a new outbound email). If the rule is linked to an event — also through an inquiry — the sent email then shows up there under Messages, labelled "Automation: <rule name>", and likewise on the inquiry and on the recipient's contact — see "Seeing linked emails inside the event" in Inbox: manage & link your emails in Univents. No double acknowledgement: if the action sends the Auto-reply on inquiry and the event's acknowledgement already went to the same address in the last 30 minutes — from your booking page or from another rule — the action sends nothing. All other templates always go out. The run history then shows the run as Skipped, with the reason.
- Notify user: Notifies one or more people on your team. You choose the Users directly from a searchable list of people with access to management. Optionally set a custom Title and Message for the notification — leave both empty and Univents uses an automatically generated default text.
- Set field: Changes a value on the triggering record (for example the event or the inquiry). You choose the Field from a fixed list (such as Internal note or Project planner) and enter the new Value.
- Assign staff: Assigns a person as the Assigned staff member. You pick them from the list of people with access to management.
- Change tags: Adds or removes tags on the trigger's event. You choose separately which tags to add and which to remove — the same tag can't be in both lists.
- Change status: Sets a new kanban column on the object of the trigger — on the event for an event trigger, on the inquiry for an inquiry trigger. You choose the New status from every column in your workspace; whether the specific transition is allowed is only decided at run time, against the status the object has then. A transition that isn't allowed is skipped and noted in the run history instead of stopping the rule. Only available for event and inquiry triggers.
- Create task: Creates a task. If you choose a Task template, the new task takes its title, type, description, and due date from there. Without a template, you fill in Title, Task type, and optionally a Description directly. For Assignee, choose between A specific person or automatically The event owner — if the latter is empty on the event, the task is created unassigned instead of failing. Optionally set a Due date relative to the event start or to the trigger time — an amount plus a unit of Minutes, Hours, or Days (for example "2 hours after the trigger time" or "3 days before the event start"). A due date in minutes or hours also gives the new task a time of day; a due date in days stays day-only, as before. Existing rules created before this addition keep running unchanged, in days.
- Create function sheet: Automatically creates a function sheet for the linked event. You can optionally choose a Function sheet template, which determines what appears on the sheet (floor plan, booking time, description, prices, planned/actual) — without one, the default settings apply. Below that you can have the sheet sent straight away: to members, to contacts, and to further addresses (comma-separated — a network printer's address works too, so it prints on arrival). The event’s customer is not included automatically – they only receive the sheet if you explicitly pick them under Contacts. As soon as at least one recipient is set, Subject and Message appear (both accept placeholders) along with the Attach the sheet as a PDF switch, which is on by default. Without recipients the sheet is only created, exactly as before. A contact's address is read at run time — if a supplier moves, the mail follows.
- Create production list: Automatically creates the production list for the linked event — the same as the button for it in the Bookings tab. If the event has several orders and the newest one has no items, no empty delivery note is created; the production list still contains all items of the event, and the run history shows a clear note instead of an error. The Notify the kitchen in the employee portal switch sends everyone with a shift on this event a direct notification with a link into the kitchen view — no email, no PDF — plus a push notification for anyone who installed the app. Who gets notified always follows the shift schedule at the time of delivery, not the state when the rule was saved. In addition or instead, you can email the list: choose recipients To members on your team, To contacts (the address is resolved from the chosen contact at send time — one without an address is skipped – the event’s customer is not included automatically), and/or To other addresses (separate several with a comma), plus a Subject and Message. Attach the list as a PDF controls whether the email includes the list as a PDF or just a note that it's ready. As soon as there is at least one email recipient, you can also decide how the sheet that goes out is cut: under Only print these tags you pick the tags whose positions land on the sheet — the same logic as the Tags filter on the Bookings tab, Without tag included; selecting nothing means "print everything". The One sheet per delivery note switch sends a separate list per delivery note of the event instead of one collected list, each carrying the delivery note number in the subject and the file name. Delivery notes holding no position under the chosen tag filter produce no email at all; if the event has no delivery note, it stays one list for the whole event. Both settings only affect the sheet that is sent — the production list in the kitchen monitor and the Bookings tab still covers the entire event. Without recipients and without the portal notification, the list is only created — it shows up in the kitchen monitor and the Bookings tab, and nothing goes out.
- Create quote from template: Automatically creates a draft quote for the linked event and pulls in the line items from its booking — exactly as if you created the quote by hand. If the customer has a default discount on file, it's applied automatically. If the event has no booking, nothing happens.
- Create schedule from template: Creates a schedule for the linked event. You choose a Schedule template; its times are placed at the event's start and end. If the event has no start date, nothing happens.
- Run tool: Triggers an app function directly. Available: Archive event, Mark inquiry as read, and Add a note to the contact (with a text field for the Note text, which accepts placeholders). The tool acts on the object of the trigger — if that object is missing (for example an inquiry without an event), the step is skipped and noted in the history, and the remaining actions keep running.
- Export documents to accounting: Sends the financial documents of the previous month as a ZIP package by email to your accountant — the same package as the export in the documents overview (overview list as Excel, the PDFs and, if you want, the e-invoices as XRechnung XML), just automatic and without your accountant needing a Univents login. You enter the Accounting email address, pick the Document types (invoices including deposit and interim invoices, credit notes, quotes, delivery notes — invoices and credit notes are preselected) and use the Include e-invoices switch to decide whether every invoice comes with its XRechnung. Your accountant receives an email with the period, the number of documents and a download link that is valid for 7 days — no amounts or customer names appear in the email. All documents with a service date in the previous month count; drafts are left out. If there are no documents in the previous month, your accountant only gets a notice. More than 300 documents do not fit into one package — the rule then does not run, and you export the month in smaller ranges from the documents overview. This action is only available with the Once a month trigger; to create and switch on the rule you need access to the Finance module and the Core plan (or higher) — the export in the documents overview stays available in every plan.
- Delay: Pauses the rule for a set Duration (minutes, hours, or days) before the next action runs. The Re-check conditions on resume switch controls whether the rule's conditions are re-evaluated against the current state after the wait.
- AI classification: Has the AI fill in a Target field using Labels you define. Consumes your workspace's AI credits (see AI Credits & Usage).
- AI reply draft: Creates a reply draft for an inbound email — a human reviews and sends it, it is never sent automatically. Only available under the Email received trigger. Consumes AI credits (see AI Credits & Usage).
Depending on the type you choose, the editor automatically shows the matching input fields. At most one of the two AI actions is allowed per rule (per path, if the rule is branched — see Branching, Testing a Rule & AI Rule Draft), and some types aren't offered at all depending on the trigger (see Send email and AI reply draft above) — Create production list, Create function sheet, Create quote from template, and Create schedule from template, for example, aren't offered under the New inquiry trigger because no event exists yet at that point. With the Once a month trigger, only Export documents to accounting and Notify user are available, and Export documents to accounting is in turn only available there.
Which actions are part of the Growth plan
Change status, Run tool, the five creator actions (Create task, Create function sheet, Create production list, Create quote from template, Create schedule from template), and custom mail templates in Send email are part of the Growth plan. Without that plan, they're not offered when you add a new action. Existing rules that already use one of these actions keep running unchanged — you can switch them off or delete them; editing them needs the bigger plan. Send email, Notify user, Set field, Assign staff, Change tags, Delay, and both AI actions are included in every plan. Export documents to accounting is included from the Core plan — without it, the action is not offered when adding one, and the editor shows the notice with trial and upgrade options at the Once a month trigger.
Custom mail templates
Under Settings → Email templates you'll find the Custom templates section. There you create freely named templates with a Name, Subject, and Body — the name only shows up internally in your automation's selection, the recipient never sees it. In the body and subject you can use the same placeholders as in a Send email action; which additional ones are available depends on the trigger of the rule in question. A custom template can then be selected in any automation's Send email action. If you delete a template that's still used by a rule, that rule stops sending mail afterwards — switch it to a different template first.
Using placeholders in text fields
In Subject and Template variables (Send email) as well as Title and Message (Notify user), you can use placeholders such as {{name}} or {{gross_total}} — Univents replaces them with the current values of the event, inquiry, or finance document when the rule runs. Click the placeholder button (the curly-braces icon) next to the field to see the placeholders available for the chosen trigger and insert one with a click. Which placeholders are available depends on the chosen trigger — under the Email received trigger there are none, since mail content isn't exposed as a placeholder for privacy reasons. To (email) is the one exception: this field never accepts placeholders, since it has to be a fixed address.
Create and configure an action
Here's how to add an action to your rule:
- In the Actions section, click Add action for one of the fourteen regular action types — or Add delay if you want to build in a wait. A new action row appears.
- In the Action type dropdown, choose the type you want (for example Send email or Create task).
- Fill in the fields that appear, such as Template and Subject for an email.
- Repeat the steps for further actions.
Each path of a rule allows at most three regular actions — every type except Delay counts toward this limit (an unbranched rule has exactly one path; several paths are a branch). Delays don't count against it, but a path can have at most 7 action rows in total (regular actions and delays combined). Once a limit is reached, the editor hides the matching button (Add action or Add delay). To remove an action you no longer need, use the trash icon on the right edge of its row. The last remaining action cannot be deleted, because every rule needs at least one action.
Setting the order of actions
When a rule has multiple actions, they run from top to bottom. Use the arrows on the left of each action row to set the order:
- Click the Move up arrow to move an action one position forward.
- Click the Move down arrow to move it further back.
The top action runs first, the bottom one last. This is helpful, for example, when you want to Set field first and then Send email so that the email reflects the new value. For the first item the Move up arrow is disabled, and for the last item the Move down arrow is disabled.
Tips
- Under Rule name, give every rule a meaningful name such as "Confirm inquiry". That way you can tell at a glance what it does in the overview.
- For Notify user you can pick multiple recipients directly from the list of people with access to management.
- After saving, you can expand the run history in the rule overview using the chevron on the right edge of a rule (tooltip Show history) and check how the rule has been running.
- A rule only takes effect once it's active. Use the switch on the right edge of the rule overview to set it to Active or Inactive.
Frequently asked questions
How many actions can a rule have? At least one and at most three regular actions per path. You can also add any number of delays in between — a path can have at most 7 action rows in total. Once a limit is reached, the matching button disappears. If a rule has several paths, the limit applies to each path separately.
Can I change the type of an existing action? Yes. Just choose a different type in the dropdown of the action row. The input fields automatically adapt to the new type.
Why did my rule skip an email? This only happens with the acknowledgement: it already went to the same address of the same event in the last 30 minutes — for example because your booking page sends it itself. Univents then doesn't send it a second time. Invoices, messages and all other templates are never skipped. The run history shows the run as Skipped with exactly this reason. The booking page's confirmation email counts as the same email as the Auto-reply on inquiry.
Why can't I save my rule? Every rule needs a Trigger and at least one action. If a required entry is missing, a notice appears above the buttons and the rule is not saved.