Creating and getting the most out of event locations
You create event locations, maintain details, photos, default tasks, linked products, floor-plan templates, and files, and see each location's schedule and events at a glance.
In Univents, event locations are the venues you plan and market. You set them up once, maintain capacity, address, photos, and tags, and then see all linked events, the utilization, and the next dates for each location at a glance.
Opening locations and creating new ones
You'll find this area in the main navigation under Locations. At the top you'll see the heading Locations with the note "Map, utilization, and operations in one view." Below it, you switch between the views using the Map, Locations, Groups, Utilization, and Schedule tabs. When you open the area, the Locations tab is active.
- Click New Location in the top right. A centered form opens.
- Fill in the fields in the General information section and add address, color, and images as needed.
- Click Create at the bottom to save the location. For an existing location, the button is labeled Save.
A location you've created appears immediately in the list on the Locations tab. Using the search field in the top right (keyboard shortcut ⌘K), you can quickly jump to a specific location, a group, an action, or a view.
Maintaining general information
In the General information section, you define how the location appears internally and on the booking page.
- Name: Required field. Shown in the list, in the calendar, and on the booking page. Phrase it clearly and recognizably.
- Capacity (people): Maximum number of guests, for example "200." Helps you and your customers gauge the location correctly.
- Area (sqm): Optional square-meter value, for example "400."
- Description: Free text that makes the location tangible for customers. Describe which events it suits and what makes it special.
- Tags: Keywords that you type and add with Enter. On the Locations tab, you can later filter by these tags.
Using the language selector under Languages, you can additionally maintain the Name and Description in other languages, in case you use multilingual booking pages.
Linking default tasks and products automatically
In the Tasks on booking section, choose one of your task-list templates under Default task list. When this location is assigned to an event, the tasks from this template are created on the event automatically — once per event. Leaving it on None — don't create tasks automatically means nothing happens automatically.
In the Products / services section, under Linked products, you set which products are billed as venue line items automatically whenever the location is booked. The price follows each product's own billing model (per hour, per piece, …).
Adding address, color, and photos
Under the Address section, you type the address into the address field. The suggestions automatically complete street, postal code, city, and country and store the geocoordinates, so the location later appears with a pin on the Map tab and in the map preview of the detail view.
In the Color section, you choose a color from the color swatches. It marks the location in the list, on the map, and in the calendar. Use Clear to remove the selection again.
In the Images section, you upload photos using the Add image area (a maximum of 12, each up to 5 MB). Use the star icon to mark a Hero image, which appears as the cover image on the booking page and in the list thumbnail. Use the X icon to remove an image again.
The first time you save the location, Univents unlocks two more sections: Floor plans and Files. Until then, the form shows the note "Save the location first — then you can add floor plans and upload files."
In the Floor plans section, you create scaled seating-plan templates for this location — the same tables/chairs/capacity logic as the Floor Plan tab of an event (see Whiteboard & Seating Plan in an Event). When you later create an event with this location, you pull one of these templates straight into the event's floor plan via From location template.
In the Files section, you upload any file type for this location (Upload file (any type), up to 50 MB each). Use Download to download a file again, and Delete to remove it (with a confirmation prompt).
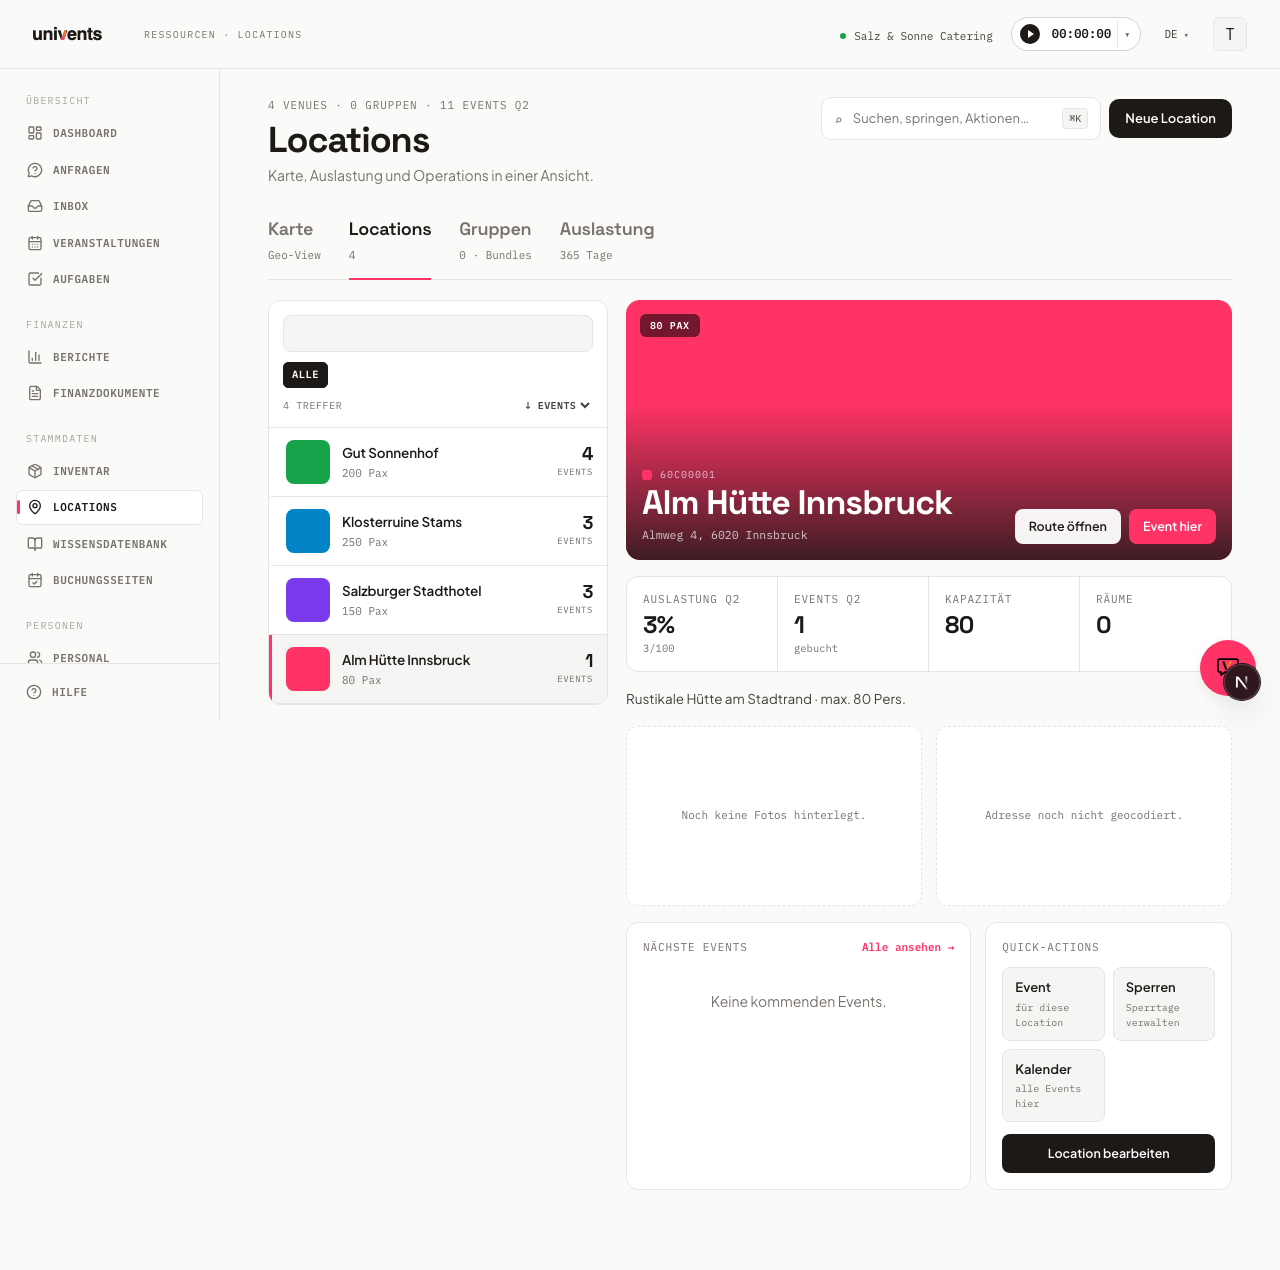
Assigning events and using the detail view
When you select a location on the left in the Locations tab, the detail view opens on the right with a cover image, address, and a metrics bar (Utilization, Events, Capacity, Rooms).
- Click Event here to create a new event for this location directly.
- In the Upcoming events area, you see the upcoming dates. Via View all, you jump to this location's filtered event list.
- Under Quick actions, you reach Event (new event), Block (manage blocked days), and Calendar (all events here).
- With Open route, you open the location's address in Google Maps in a new tab.
If a location belongs to a group, that's shown under Member of groups. To edit, click Edit location in the detail view.
Bundling locations and seeing utilization
On the Groups tab, you combine several venues into one bundle, for example to market several rooms together.
- Switch to the Groups tab and click New Group.
- Under General information, give it a Name and optionally a Description.
- In the Bundle options section, enable "Show on booking page as its own bundle" if needed and optionally enter a Bundle price (net, optional). If the field stays empty, the sum of the individual locations applies.
- In the Link venues section, you select the associated locations and save with Create.
On the Utilization tab, you see a yearly grid of booked days for each location. This lets you tell at a glance which venues are heavily booked and where capacity is still free.
Viewing occupancy as a schedule
On the Schedule tab, you see the bookings of all your locations as a calendar, with one location per row. Use the view switcher to move between Day, Week, and Month; use Previous, Today, and Next to navigate through time. If you haven't created a location yet, a note points that out; if there are no bookings in the selected range, Univents shows that too.
Tips
- Maintain a meaningful Description and good photos. A Hero image and clear text increase the booking chances on the booking page.
- Use Tags consistently so the tag filter on the Locations tab is genuinely helpful.
- Enter the address via the suggestions, not by hand. Only then does the location appear with a pin on the Map tab.
- Check the Utilization tab regularly to specifically promote less-booked locations.