How do I get started and set up my workspace?
After completing this article you will have entered your company details, uploaded your logo and brand colours, and invited your team to Univents.
To set your workspace up professionally from day one, you work through three areas: company details, branding, and team. You reach all three via Settings in the left-hand navigation menu.
Step 1: Enter your company details
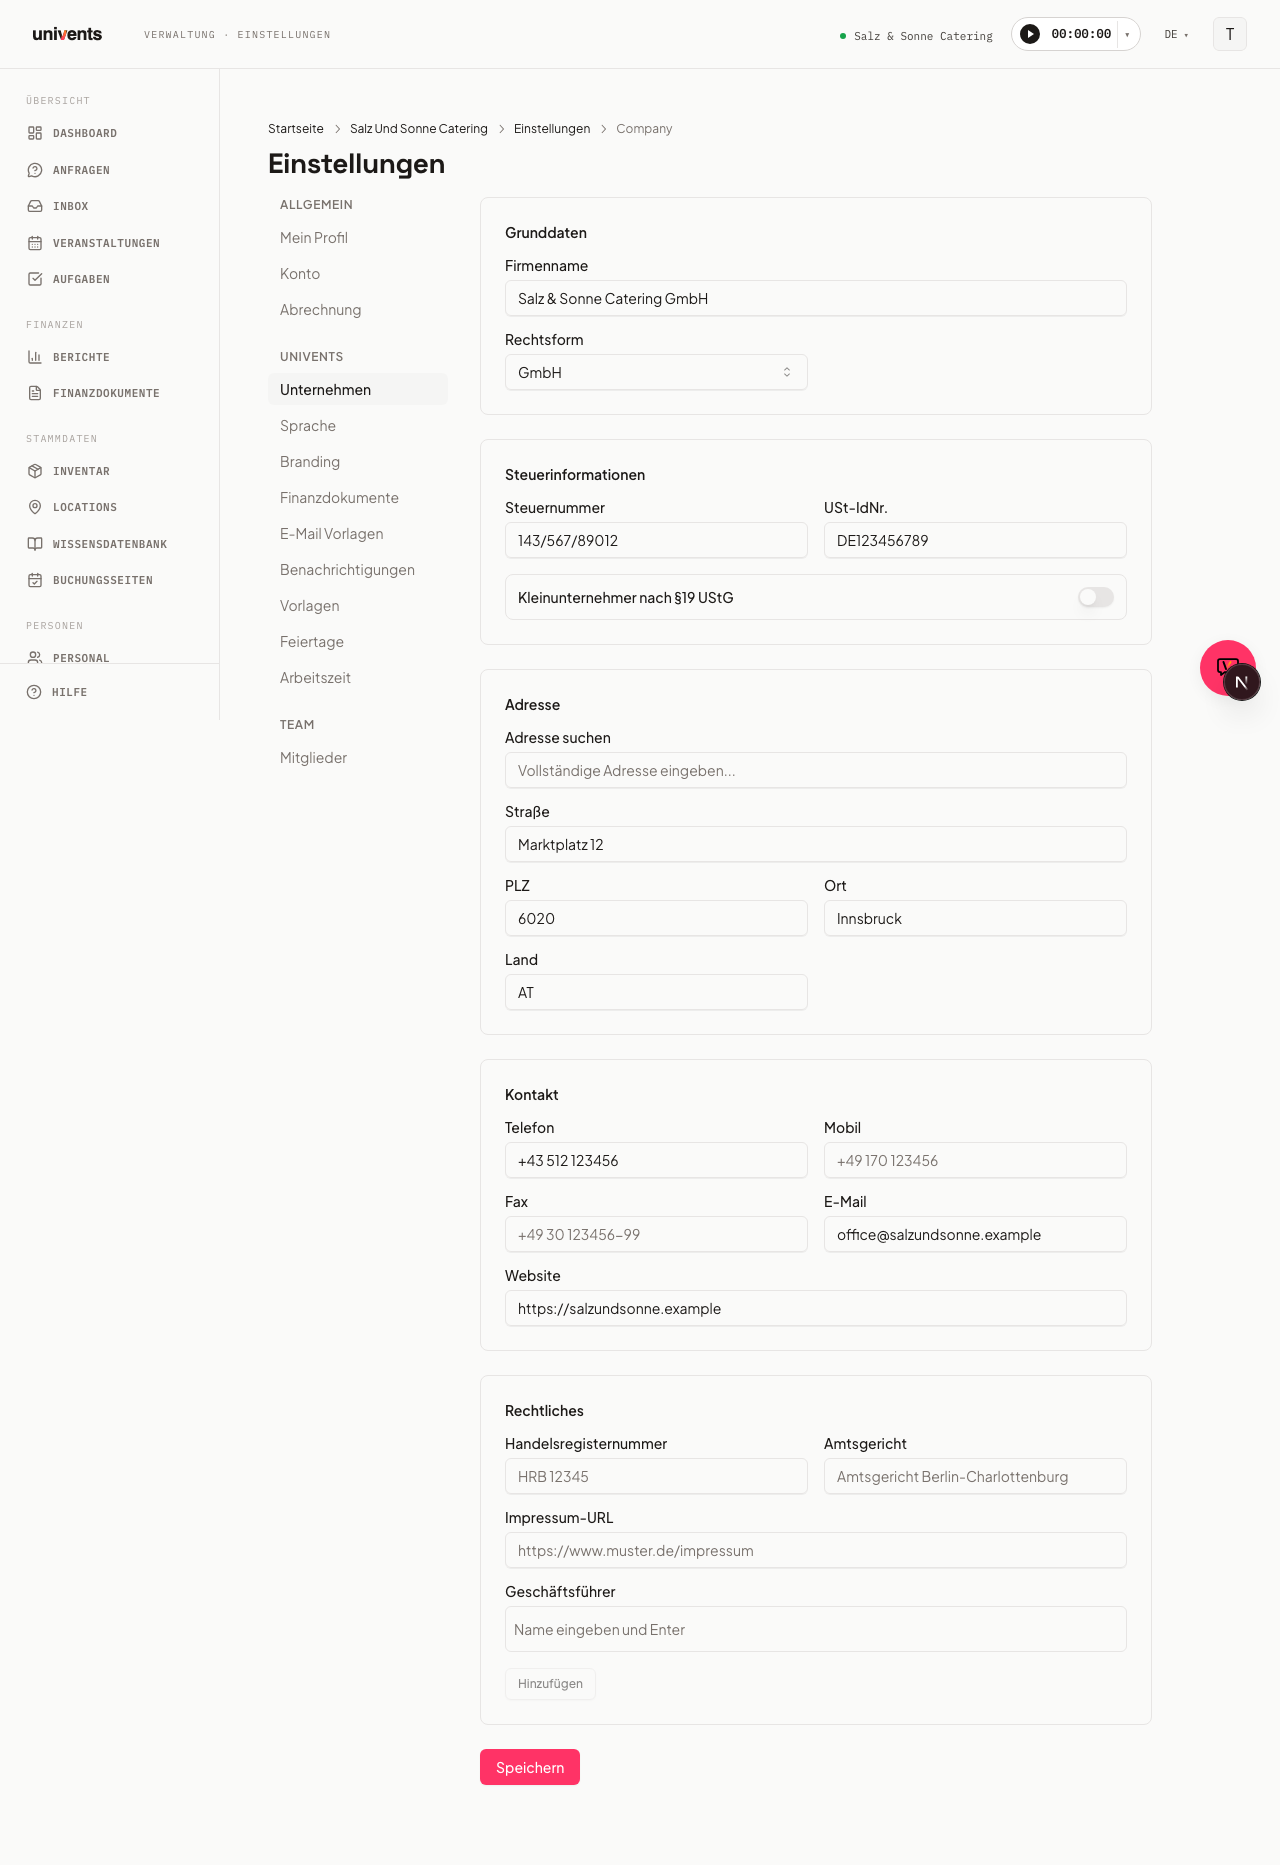
Open Settings > Company. The form is divided into eight sections.
- Basic data — enter your Company name and Legal form (e.g. GmbH, sole trader).
- Tax information — enter your Tax number and VAT ID. If you are a small business owner, enable the Small Business (§19 UStG) toggle.
- Bank details — add your Bank, IBAN, and BIC.
- Bookkeeping — optionally add a Deposit account (e.g. SKR03 1718 / SKR04 3270); Univents uses it automatically when booking received deposits in the DATEV export.
- Customer reviews — add a Google review link that happy customers are offered in the customer portal after the event.
- Address — type into the Search address field, select a suggestion from the autocomplete, and Street, Postcode, City, and Country are filled in automatically.
- Contact — add your company's Phone, Mobile, Email, and Website.
- Legal — fill in Commercial register number, Registry court, and Imprint URL. Under Executive directors, enter names and confirm each one by pressing Enter or clicking the Add button.
Click Save when you are done. These details appear on quotes, invoices, and your booking page. See Managing Company Details for the full field reference.
Step 2: Set up your logo and colours
Open Settings > Branding.
Upload a logo
- Click Choose file under Logo.
- Select a PNG, JPG, WebP, or SVG file (maximum 5 MB) from your device.
- The logo appears immediately as a preview. Use Replace to swap it out, or Remove to delete it.
Upload a favicon
Follow the same steps in the Favicon section — a PNG, ICO, or SVG file is recommended here, ideally square.
Set your colours
The Colours section shows eight colour fields (e.g. Primary, Secondary, Background). Click a colour field, pick a colour using the picker, or type the hex value directly into the text field (format #rrggbb, e.g. #ff3366). The primary colour determines buttons and accents in the customer portal and on PDFs.
Click Save once all values are correct. See Set up branding (logo, colors) for the full colour reference.
Step 3: Invite team members
Open Settings > People & Access. The page shows a single combined list of everyone in your workspace, with their access level: Owner, Admin (full app access), or Staff (portal access only).
To invite someone new:
- Click Invite Members in the top right.
- Enter the email address and the desired role.
- Confirm. The person receives an invitation email and appears in the list once they accept.
For people already in the workspace, adjust their access from the three-dot menu in their row: Grant app access (Staff → Admin), Revoke app access (Admin → Staff), or Remove entirely. Pending invitations and fine-grained roles live in the Advanced section further down the same page — see Members, Roles & Permissions for details.
Tips
- Follow the order: Company details first, then branding — this ensures invoices and quotes are complete from your very first event.
- Logo format: SVG produces the sharpest results on PDFs and in the customer portal.
- Delegate the setup: If you would prefer to hand the setup off to us, reach out via the in-app chat — we are happy to set up the workspace for you.
- Multiple locations: Locations are not configured here; use the Locations section in the main navigation instead.
Frequently asked questions
Where do I find the settings? Click Settings in the left-hand navigation bar. You will first see an overview of all sections; open individual pages via the left-hand side menu.
Can I change the logo later? Yes, at any time under Settings > Branding using the Replace button.
What happens if I don't enter the tax number? Univents saves and validates the settings regardless. However, the tax number will be missing from automatically generated invoices — it is best to add it before sending your first invoice.
How do I change a team member's access? Open Settings > People & Access, click the three-dot menu in the person's row, and choose Grant app access or Revoke app access. Fine-grained roles with individual module permissions are managed in the Advanced section (Scale plan and above).