Integrations Overview
After reading this article you will know which integrations are available in Univents, how to access them, and what each one does for your day-to-day workflow — including the DATEV export for accounting.
Under Integrations you connect external services to your Univents workspace — from payment processing and calendar or email sync to the DATEV export for accounting and API access for your own automations.
Where to find Integrations
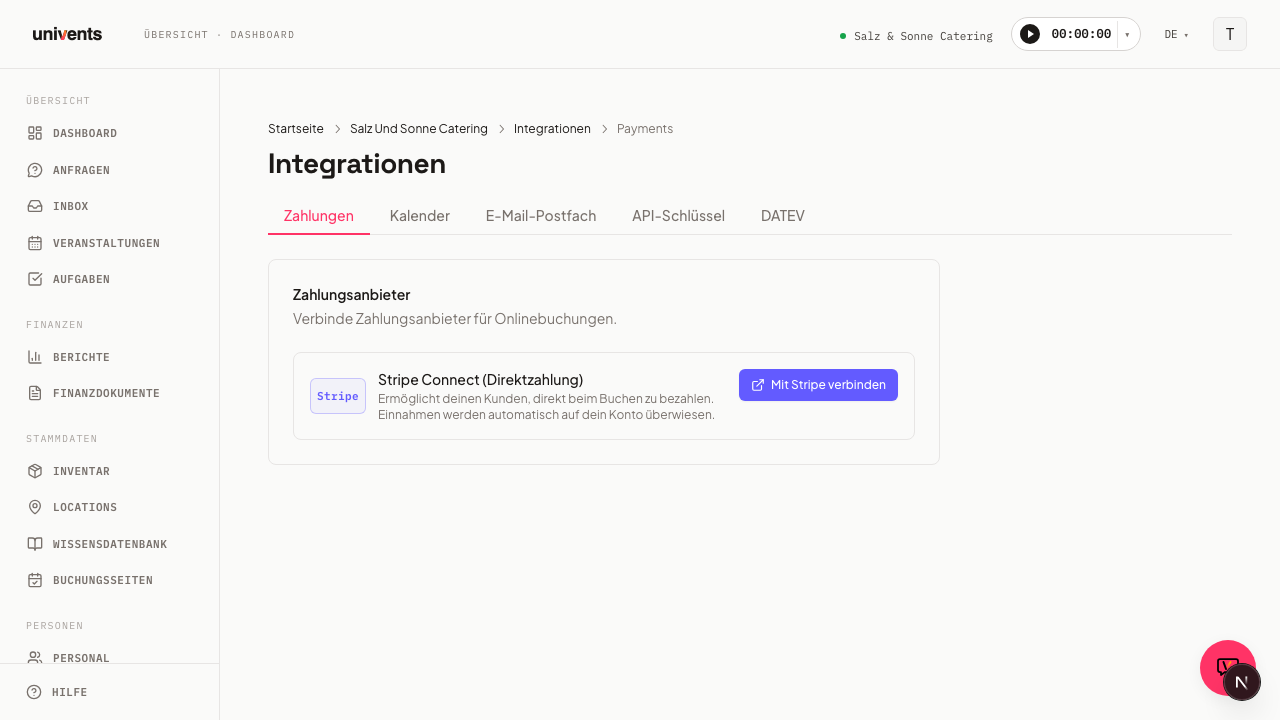
Navigate to Integrations in the left sidebar. The page opens directly on the Payments tab. At the top of the page you will find five tabs:
- Payments — Stripe Connect for online direct payments
- Calendar — Bidirectional sync with Google, Outlook, or iCloud
- Email Inbox — Connect Gmail, Outlook, or IMAP
- API Keys — Keys for external tools and MCP connections
- DATEV — Journal entry export for your accountant
Switch between sections by clicking the relevant tab.
Payments — Stripe Connect
Use the Payments tab to connect Stripe to your workspace. Once Stripe Connect is active, customers can pay directly during an online booking and the revenue is automatically transferred to your linked bank account.
- Click Mit Stripe verbinden to start the Stripe onboarding. You will be redirected to the Stripe website.
- If you have already started but not yet completed the onboarding, you will see the Onboarding fortsetzen button.
- When the connection is active, Univents displays the Aktiv badge next to the Stripe entry. You can disconnect at any time using Trennen.
Calendar — Google, Outlook, iCloud
Under the Calendar tab you sync events bidirectionally between Univents and your calendar application. Supported providers are Google Calendar, Microsoft Outlook, and iCloud Calendar.
- Click Neue Verbindung to start an authentication flow.
- After authenticating, the connection card appears. Use the Kalender auswählen dropdown to choose your target calendar.
- Use Locations zuweisen to specify which of your locations should push events to this calendar. Without an assignment, pushes go to all connected calendars.
- Click Jetzt synchronisieren to manually fetch external appointments.
- If the connection card shows the Verbindung abgelaufen — neu verbinden badge, click that same button to renew the authentication.
Email Inbox — Gmail, Outlook, IMAP
Under the Email Inbox tab you mirror incoming emails from one or more accounts into Univents. You continue sending replies from your own mail client; Univents only shows a preview and links messages to inquiries, events, and contacts.
Before connecting, choose your visibility setting under Sichtbarkeit neuer E-Mail-Konten:
- Pro Workspace (Standard) — all team members can see the inbox.
- Pro User — only the person who connected the account can see it.
Then click E-Mail-Konto verbinden and follow the authentication flow. Once an account is connected, the initial sync can take up to 24 hours before all messages appear.
API Keys
Under the API Keys tab you create and manage keys for external integrations and MCP connections (e.g. Claude Desktop, n8n).
- Click Neuen Schlüssel erstellen.
- Give the key a descriptive Name (e.g. "Claude Desktop", "n8n Workflow", or "DWH export").
- Under Permissions, pick the scopes you need — split per resource into Read and Write (e.g.
events:read,contacts:write). For pure data exports into a DWH/BI tool the Read scopes are enough;mcp:readis the AI / MCP access. Write does not imply read — each is selected separately. - Click Erstellen. The full key (
rv_live_…) is shown only once — copy it immediately using the copy icon. - Keys that are no longer needed can be deactivated via Widerrufen or permanently removed using the trash icon.
Accounting — DATEV export
Use the DATEV tab to export your outgoing invoices as DATEV journal entries (EXTF-CSV) — the format accountants in Germany and Austria expect for import into their firm software. For every settings field in detail, see the Accounting Integrations article.
- Open the DATEV tab and, under DATEV Settings, enter your accountant's details: Consultant Number, Client Number, Chart of Accounts (SKR03 or SKR04), and the default debtor and revenue accounts. Click Save Settings.
- If these details are still missing, Univents shows the DATEV settings missing notice at the top of the page — follow the link to fill them in.
- Once the settings are saved, choose the period you want (From/To) under Export Journal Entries and click Download DATEV CSV.
- Invoices already exported for the selected period are skipped automatically on the next export. To re-export — for example after a correction — enable Re-export: include already exported invoices.
If the DATEV tab isn't available in your workspace, the feature isn't included in your current plan yet — Univents shows an upgrade notice in its place.
REST API (data export to your DWH/BI)
Univents offers a regular REST API (v1) — built for continuous import of your workspace data into a data warehouse or BI tool (initial full pull + incremental delta sync). No MCP/AI required; this is the classic, structured route.
- Specification (public, retrievable without a key, importable straight into Postman/codegen):
- OpenAPI 3.1: https://univents.app/api/v1/openapi.json
- Interactive docs: https://univents.app/api/v1/docs
- Authentication: Bearer API key (
rv_live_…) with Read scopes per resource (see above). - Data streams: events, contacts & companies, locations (master data), plus inquiries, bookings + line items, and finance documents — quotes/invoices/delivery notes — including their line items (transaction data).
- Delta sync:
updated_sincefetches only changes; cursor pagination returns complete pages (dedupe byidif needed). Deleted records appear as tombstones (include_deleted=true) or in the dedicated/deleted-recordsstream. All timestamps are ISO 8601 UTC. Limit: 120 requests/minute per key.
For a running setup, contact support — we provide a key and add any missing fields on request.
Frequently Asked Questions
Can I connect multiple calendars at the same time? Yes. Add further accounts via Neue Verbindung and assign each connection its own locations so that pushes go to the right calendar.
What happens when a calendar or email connection expires? Univents shows the Verbindung abgelaufen — neu verbinden badge directly on the connection card. Click it to renew the authentication; all existing settings (calendar selection, location assignments) are preserved.
Is my API key secure? Treat the key like a password. After creation, Univents displays it exactly once. If a key is ever compromised, revoke it immediately via Widerrufen and create a new one.
Can I export my data to my own DWH via the API? Yes. Use the REST API (see the section above) with a Read key. It is built for continuous full and delta export; the specification is public at https://univents.app/api/v1/openapi.json and imports straight into your tooling.
What exactly does the DATEV export include? Finalized outgoing invoices (no longer drafts) from the selected period, as journal entries in EXTF-CSV format — ready to import into your accountant's firm software. Field-by-field details are in the Accounting Integrations article.
I don't see a "DATEV" tab — why not? The DATEV export is unlocked from a certain Univents plan onward. If you click into the section anyway, Univents shows you an upgrade notice instead of the export feature.