

Item Templates: Create & Insert
After reading this article you'll be able to save recurring positions as an item template and insert them into any quote, invoice, or delivery note with a single click.
An item template bundles individual positions — for example a catering package made up of several lines — into a reusable building block. Create it once, then insert it into any quote, invoice, or delivery note with a single click. This article is for anyone who repeatedly uses the same positions across finance documents.
An item template contains only positions and sections — no date, no customer, no layout. For a complete document as a template (including due date, assigned staff, and layout), use a finance document template instead.
The video shows how to save a line item template from a quote, edit it under Settings and insert it into a new quote with one click.
You’ll find the individual steps written out below as well.
Create an item template
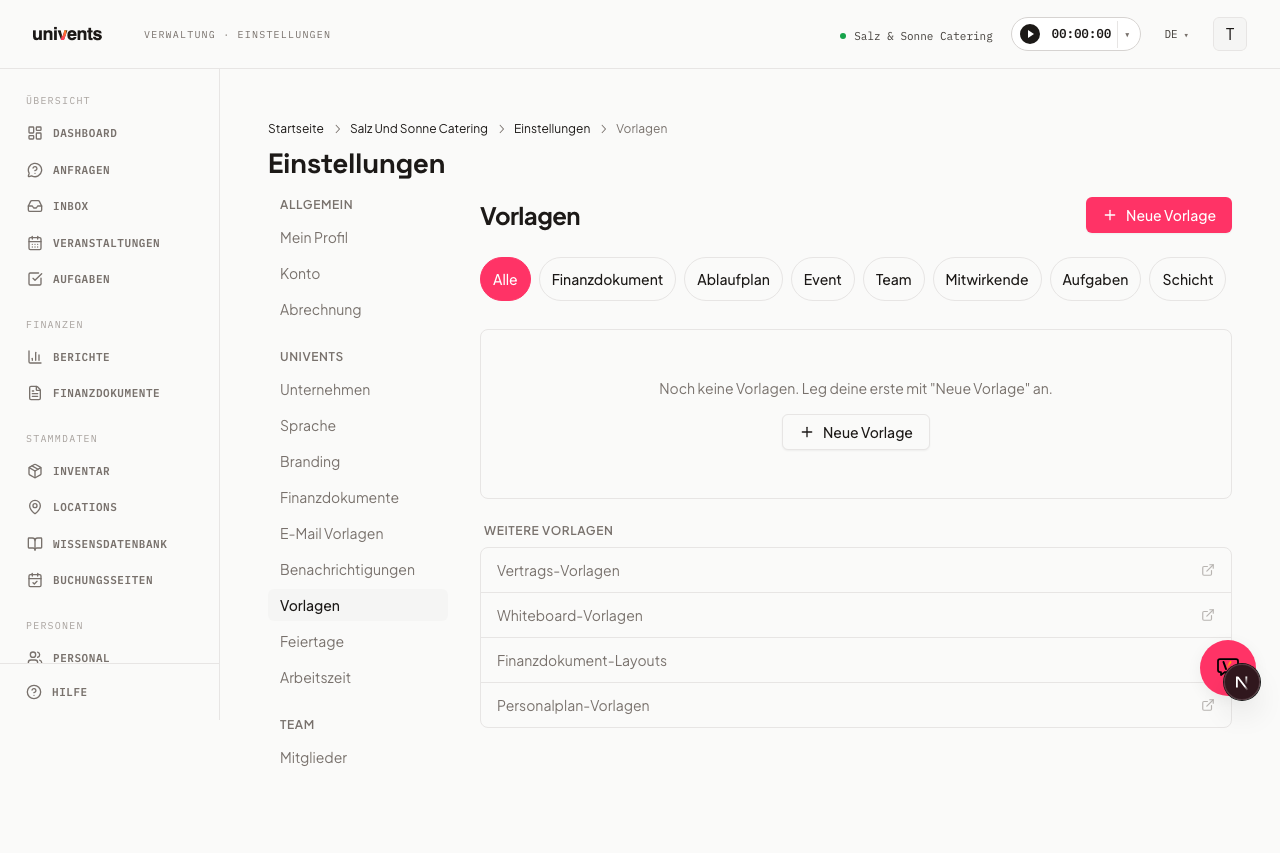
- Open Settings in the main navigation and select Templates in the sidebar.
- Click New Template in the top-right corner.
- In the Documents & finance group, choose Item template.
- Enter a meaningful name in the Template Name field, e.g. "Catering Package Standard". Category and Description are optional — the category later determines which group the template is sorted into in the Choose a template dialog (see below).
- Add one or more rows under Positions, each with a title, quantity, unit, Price (€), Discount (%), and VAT (%). You can also group positions into sections, e.g. "Food" and "Drinks".
- Turn on Use product name if you want the linked product's name to be used instead of your free text when the template is inserted.
- Click Save — the template appears in the list immediately.
Save a template directly from a document
You don't need to switch to Settings first — from any quote, invoice, or delivery note you can save the current position list as a new template:
- Open the positions table in the finance document.
- Click Save as item template below the table.
- Enter a Name and, optionally, a Description.
- Click Save — the editor stays open, and the new template is immediately available for other documents.
Insert a template into a finance document
- Open a quote, invoice, or any other finance document.
- Click Add from template below the positions table.
- In the Choose a template dialog, search your saved templates by name. Templates are additionally grouped by their Category — templates without a category appear under the General group. This makes it easier to find the right one once you have many saved templates.
- Click Add next to the template you want — all its positions and sections are inserted into the document immediately.
- Edit the inserted positions directly in the document without affecting the template. You can reopen the dialog as many times as you like to combine positions from several templates in one document.
When you create a document via New Document > Create from template, the picker lists both kinds separately: quote, invoice, or delivery note templates (complete documents including header fields) on top, and the item templates collapsed underneath. Click the Item templates heading to expand them. If you haven't saved a quote template yet, the group starts expanded.
Edit or delete a template
- Open Settings > Templates.
- Click the item template you want to change in the list — the edit dialog opens with all saved values.
- Make your changes and click Save.
- To delete, click Delete in the dialog and confirm the "Really delete this template?" prompt. The template is then permanently removed; positions already inserted into existing documents remain unchanged.
Remove several positions at once
The edit dialog shows a checkbox in front of every position, plus a Select all checkbox above the table:
- Tick the positions you want to remove — or use the checkbox in the header to select them all at once.
- A bar appears above the table showing how many positions are selected.
- Click Delete there and confirm the prompt.
- Then click Save so the change is stored in the template.
Clear selection discards the selection without deleting anything. To remove a single position, keep using the menu at the right-hand end of its row.
Template types at a glance
Univents distinguishes between several template types under Settings > Templates. Don't mix them up:
| Type | Contains | Where you create it |
|---|---|---|
| Item template | Only positions and sections | Settings > Templates, or directly from a document |
| Finance document template | A complete document: positions, due date, assigned staff, layout | Settings > Templates |
| Layout template | Only the visual PDF design (colors, logo, sections) | Settings > Templates |
For details on finance document templates, see Finance Document Templates: Create & Use. For an overview of quotes, invoices, and delivery notes themselves, see Financial Documents: Quotes, Invoices & Delivery Notes.
Frequently asked questions
If I change a template later, does it affect documents I already created? No. Changes to an item template only apply to future insertions. Positions already inserted into existing documents remain unchanged.
Why don't I see any entries in the "Choose a template" dialog? No item template has been created yet. Go to Settings > Templates, click New Template, and choose Item template.
Can I insert the same template into a document more than once? Yes. Every click on Add inserts the positions again — useful if, for example, you need the same flat rate for several rooms.
What's the difference between an item template and a finance document template? An item template contains only positions. A finance document template is a complete document including due date, assigned staff, and layout, which you duplicate instead of setting up from scratch — see Finance Document Templates: Create & Use for details.
Are product descriptions carried into the template? Yes. When you pick a product on a position, Univents adopts the description from the product master data — exactly like the regular position editor does. You can overwrite it in the template; your own text always wins. Positions from older templates that were saved without a description get the product description filled in automatically when the template is inserted into a document.
How do I add a position to a specific section? Hover between two rows or right below a section heading and click the +. The new position is created exactly there, inside that section. Add position at the bottom puts it into the last section of the template; if the template has no section yet, it goes under "No section". This matters because positions without a section are sorted to the very end of the finished quote.