

Creating and Pricing Shifts & Jobs
After reading this article you'll be able to create jobs, price shifts, decide whether staff sign up directly or apply first, and use reminders to quickly fill open shifts with the right staff.
The Shift Plan for an event is where you decide who works when and where, what that work costs, and how to fill open shifts efficiently.
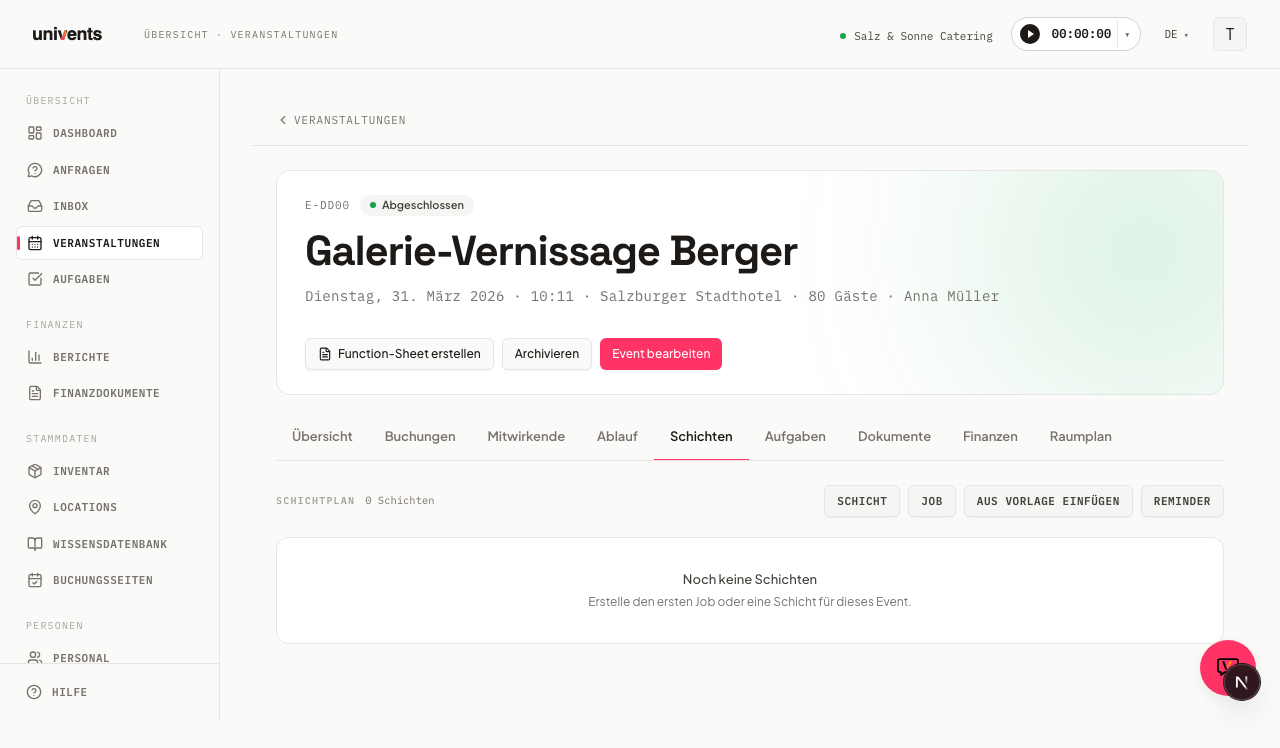
Overview: Jobs and Shifts
A Job is the container — for example "Service Staff", "Setup Crew", or "Bar Team". Within a job you create individual Shifts: concrete time blocks with a date, start and end time, and a headcount requirement.
Open the Shift Plan tab inside an event. In the top-right corner you'll find four buttons: Shift, Job, Insert from template, and Reminder. You can create jobs and shifts in any order; a shift that isn't assigned to a job appears in the Other Shifts section.
Creating a Job
- Click Job to open the "Add Job" dialog.
- Enter a name in the Job Title field, e.g. "Service Staff" or "Setup Crew".
- Pick a Color — it makes the shift plan much easier to scan at a glance.
- Optional: fill in Description, Address, Address Info, and Required Skills.
- Click Add. The job appears as a card in the shift plan.
Tip on Required Skills: if you add skills here (e.g. "Barista", "Forklift License"), only staff members who have those skills will see the shift in the employee portal.
Creating a Shift
- Click the colored Shift button in the job header — or use the global Shift button in the top-right to create a shift without a job assignment.
- In the "Add Shift" dialog, fill in:
- Shift Name / Role (e.g. "Setup", "Service")
- Start Time and End Time — pre-filled automatically from the event date
- Required Staff — how many people are needed for this shift
- Optional: Assigned Staff (assign people directly), Contact Person / Responsible, Address / Meeting Point
- Enable Allow self-signup if staff should be able to sign up for this shift themselves via the portal.
- Once that is on, Approval required appears below it. Leave it off for first come, first served — one click and the person is on the shift. Turn it on when you want to decide who gets the shift.
- Click Shift to save.
Sign up or apply?
The two switches give you two ways of working:
| Approval required | What happens in the portal |
|---|---|
| off (default) | The button reads Sign up. One click and the person is on the shift; the slot is taken. |
| on | The button reads Apply. An application is created and the slot stays free — several people can apply for the same shift. |
Existing shifts do not change their behaviour: approval is off for them, so signing up stays immediate. If you work with shift templates, set the switch once in the template — every shift created from it carries it over.
Accepting or rejecting applications
You will find applications in two places:
- On the shift itself — open the shift and the Applications section lists everyone who applied.
- Under Staff → Applications — the collected list across all shifts, sorted by date. That way no application is left sitting just because nobody opened the shift again.
Accept puts the person on the shift and takes the slot. Reject removes the application; the same person can apply again afterwards. Either way they get a message with the outcome. Once the shift is full, further applications lead nowhere — simply do not accept another one.
Pricing a Shift
The same dialog — whether you're creating or editing a shift — contains the Pricing section. This links the staffing work directly to the financial calculation.
- Click Add product.
- Fill in the columns Title, Qty, Unit, Cost (net), Price (net), Disc%, and Tax%.
- The Total column calculates automatically. You can add multiple rows — for example one for the base hourly rate and one for a night-shift surcharge.
- Save the shift — the line items then appear in the event's financial calculation.
Saving and Reusing a Job as a Template
To avoid recreating a tried-and-tested job from scratch every time:
- Click Save as template in the job header. The job, including all its shifts, is saved as a template.
- In another event, click Insert from template, select the saved template from the list, and confirm. The job and all its shifts are copied across in full.
To remove a template you no longer need, open the Insert from template dialog — every saved template has a delete icon next to it.
Sending a Reminder for Open Shifts
If not all shifts are staffed yet, you can notify targeted staff members by email.
- Click Reminder in the top-right of the shift plan. The dialog shows how many open shifts still need filling.
- Choose who to notify — you can filter by Crew Groups, Crew Templates, Tags, or Skills.
- Click Send Reminder. Each selected person receives an email with a direct link to the sign-up page.
A week at a glance across all events: the Disposition Board
The shift plan on this page shows the shifts for a single event. If you'd rather see who's scheduled across multiple events during a given week, switch to Staff > Shift Plan — the Disposition Board shows the whole week, staff × day, at a glance, including reassigning by drag and drop, an availability layer, and running staff costs. See the Disposition Board for Staff Planning article for details.
Frequently Asked Questions
The staffing indicator shows red — what does that mean? Red means the shift is not yet fully staffed (e.g. "1/2" instead of "2/2"). The summary bar at the bottom of the shift plan lists all affected shifts.
Can I assign a shift to more than one job? No. A shift belongs to exactly one job. If you create a shift without a job assignment (via the global Shift button), it appears in the Other Shifts section.
How do I remove a job? Click the ✕ icon in the job header and confirm the dialog — all shifts belonging to that job will be deleted along with it. This action cannot be undone.
When is the timeline at the bottom useful? As soon as at least one shift exists, the timeline shows all shifts as colored bars on a time axis. This lets you see at a glance whether shifts overlap or whether there are gaps in coverage.